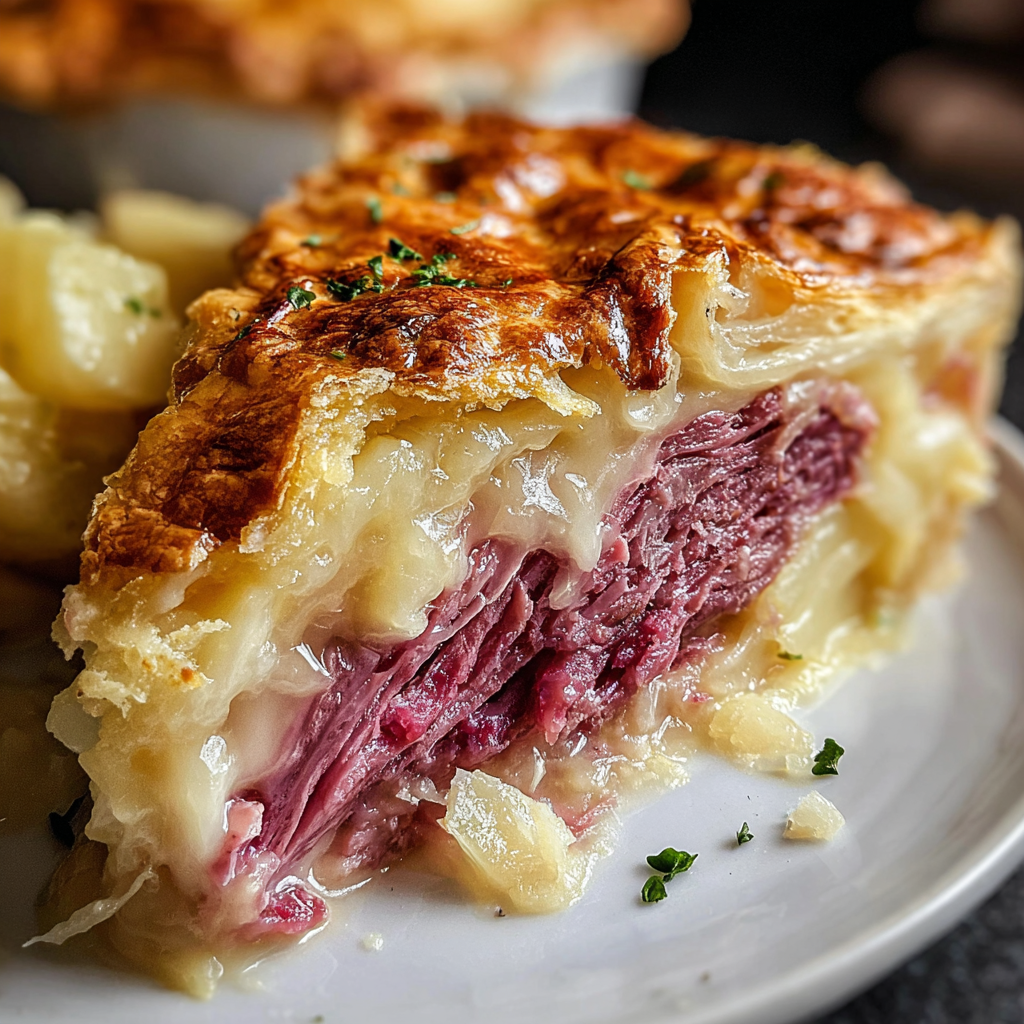
Introduction
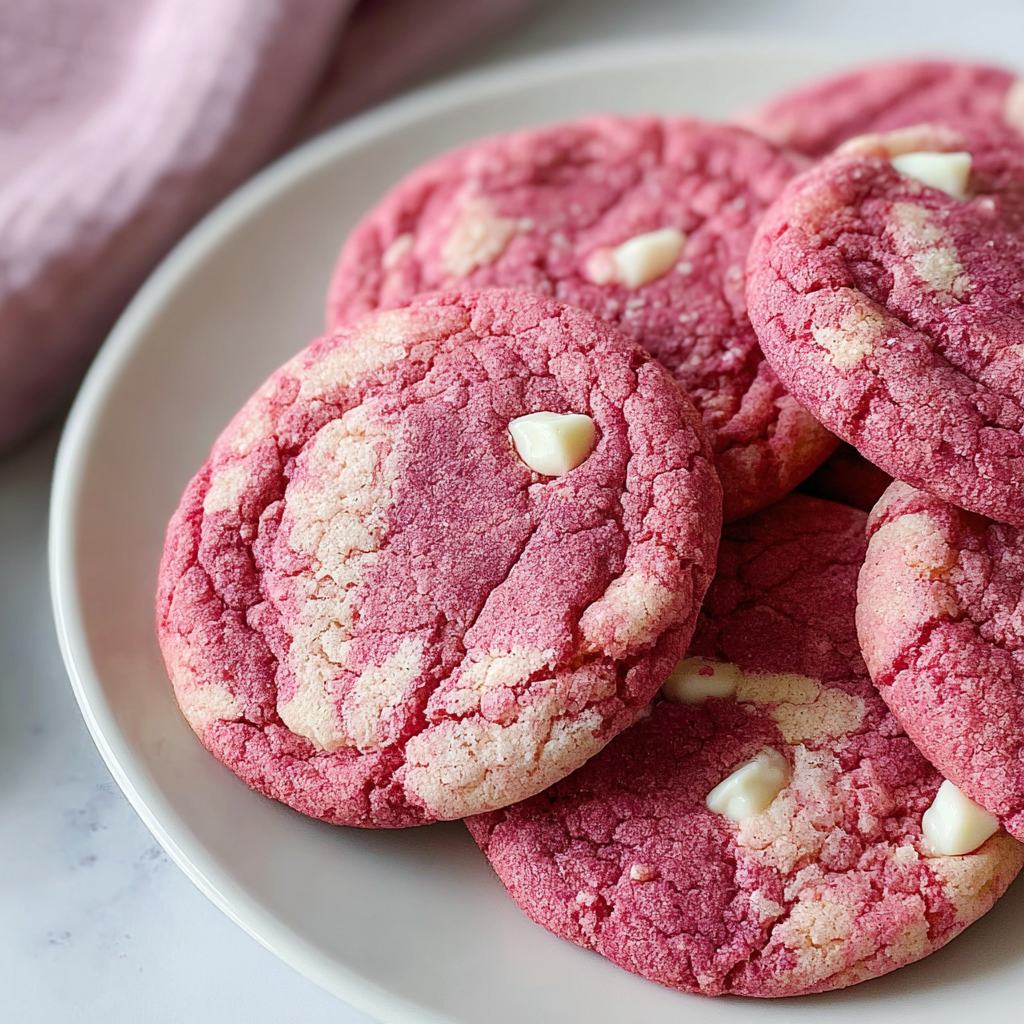
Pink velvet cookies provide a delightful twist on classic cookie recipes, offering both visual appeal and a unique flavor profile. These cookies are not just a feast for the eyes; they deliver a moist, tender bite that will enchant your taste buds.
The vibrant hue comes from a blend of rich cocoa and vibrant pink food coloring, making them the perfect treat for celebrations, holidays, or simply indulging yourself. Their texture is reminiscent of a soft red velvet cake, making every bite a pleasurable experience.
Ingredients
- 2 1/2 cups all-purpose flour
All-purpose flour provides the structure for the cookies, creating a soft yet sturdy base. It allows for a tender crumb while ensuring the cookies hold their shape during baking. - 1/2 cup unsweetened cocoa powder
Cocoa powder infuses the pink cookies with a rich chocolate flavor, balancing the sweetness and creating a wonderful depth in taste. - 1 teaspoon baking soda
Baking soda acts as a leavening agent, helping the cookies rise and develop a soft, cakey texture. It's crucial for achieving the right consistency. - 1/2 teaspoon baking powder
Baking powder complements the baking soda, ensuring the cookies have a light and airy quality. Both leavening agents work together to give the perfect rise. - 1/2 teaspoon salt
Salt enhances the flavors in baking, bringing out the sweetness and balancing the overall taste of the cookies. - 1 cup unsalted butter, softened
Butter adds richness and moisture to cookies, contributing to their texture and providing a delicious, creamy flavor. - 1 cup granulated sugar
Sugar not only sweetens the cookies but also aids in achieving a tender crumb. It plays a key role in the creaming process, helping to incorporate air for a lighter texture. - 1/2 cup brown sugar, packed
Brown sugar adds moisture and a subtle caramel flavor thanks to its molasses content, enhancing the overall flavor profile of the cookies. - 2 large eggs
Eggs bind the ingredients together and provide moisture, contributing to the overall structure and richness of the cookies. - 1 teaspoon vanilla extract
Vanilla extract is a flavor enhancer that adds depth to the cookies, making every bite more enjoyable and aromatic. - 2 tablespoons pink food coloring
Food coloring gives the cookies their signature pink hue, making them visually appealing and festive for any occasion. - 1 cup white chocolate chips
White chocolate chips add sweet creaminess and a delightful contrast to the chocolatey flavor of the cookies, enhancing both texture and taste.
Directions & Preparation
Step 1: Preheat the oven to 350°F (175°C).
Preheating your oven is essential for even baking. A properly heated oven ensures that the cookies rise and spread correctly, resulting in the perfect texture and color.
Step 2: In a bowl, whisk together all-purpose flour, cocoa powder, baking soda, baking powder, and salt.
Whisking the dry ingredients together allows for even distribution of the leavening agents and cocoa powder. This step helps to prevent clumping and ensures a uniform flavor and texture in your cookies.
Step 3: In a large mixing bowl, cream together softened butter, granulated sugar, and brown sugar until light and fluffy.
Creaming the butter and sugars properly incorporates air into the mixture, which is crucial for a light texture in cookies. Aim for a pale, fluffy consistency, which can take about 3-5 minutes using an electric mixer.
Step 4: Add eggs, one at a time, to the butter-sugar mixture, followed by the vanilla extract and pink food coloring.
Adding eggs one at a time helps to maintain the emulsion of fat and liquid, ensuring that the cookies have a cohesive texture. The food coloring should be added gradually until the desired shade of pink is achieved.
Step 5: Gradually incorporate the dry ingredient mixture into the wet ingredients, mixing until just combined.
Overmixing the dough at this stage can lead to tough cookies. Stir until the flour is just incorporated to maintain a tender and soft texture.
Step 6: Fold in the white chocolate chips gently, ensuring they are evenly distributed.
Folding in the white chocolate chips prevents them from breaking and ensures that every bite of the cookie is packed with creamy sweetness. Be gentle to avoid overworking the dough.
Step 7: Scoop tablespoon-sized amounts of dough onto a lined baking sheet, spacing them about 2 inches apart.
Spacing the cookie dough appropriately allows for even spreading while baking. This is crucial for achieving the right texture and shapes without merging into one another.
Step 8: Bake for 10-12 minutes or until the edges are set but the centers are still soft.
Every oven varies, so it’s essential to keep an eye on the cookies. Removing them from the oven while they are slightly underbaked will result in wonderfully chewy centers as they continue to cook while cooling.
Step 9: Allow cookies to cool on the baking sheet for 5 minutes before transferring them to a wire rack.
Cooling on the baking sheet allows the cookies to firm up slightly, which prevents them from breaking when transferred. A wire rack promotes even cooling, preserving their texture.
Step 10: Once cooled, enjoy your pink velvet cookies or store them in an airtight container.
Storing cookies in an airtight container keeps them fresh and prevents them from drying out. These cookies can be enjoyed as-is or decorated for special occasions.

Cocoa’s Role in Pink Velvet Cookies
Cocoa powder is more than just a flavoring agent; it plays a pivotal role in defining the texture and overall sweetness balance of these cookies. Its unique contribution to the batter creates a delightful contrast against the sugary richness of the white chocolate chips, enhancing each cookie's taste profile. Additionally, the cocoa lends a beautiful dark undertone that complements the vibrant pink hue.
The Science Behind Creaming Butter and Sugar
Creaming butter and sugar is a fundamental technique in baking that affects the texture of the final product. This method incorporates air into the mixture, which helps the cookies rise during baking. The creamy consistency also adds richness, resulting in a tender and moist cookie. Proper creaming can be the difference between a dense cookie and one that is light and fluffy.
Perfect Pairing with White Chocolate Chips
White chocolate chips elevate the pink velvet cookies, offering a sweet creaminess that balances the slight bitterness of the cocoa. Their melting quality creates a luxurious texture within each bite, turning an already delicious cookie into an indulgent treat. These chips add not just flavor, but a delightful visual cue, contrasting with the pink dough and offering a pleasant surprise.
FAQs
What can I do if my cookie dough is too thick?
If your dough is too thick, consider adding a tablespoon of milk or an extra egg to help loosen it. Mixing thoroughly will help achieve the right consistency for scooping.
Why did my pink velvet cookies turn out bland?
If your cookies taste bland, ensure you are accurately measuring your ingredients, especially the cocoa and sugar. Also, consider adding a pinch more salt to enhance flavors.
How can I adjust these cookies for high altitude baking?
For high altitude, reduce sugar by 1-2 tablespoons and increase flour slightly. Monitoring baking time is also important to prevent over-expansion.
Are there alternative flavors I can try in these cookies?
You can experiment with different flavored chips, such as dark chocolate or caramel. Additionally, flavored extracts like almond or peppermint can add unique twists.
What should I do if my cookies spread too much during baking?
If your cookies are spreading too much, check the butter temperature. Ensure it's softened but not melting, and chill the dough for 30 minutes before baking.
Can I replace white chocolate chips with another type of chocolate?
Yes, you can substitute white chocolate chips with semi-sweet or dark chocolate chips according to your preference for a different flavor experience.
Conclusion
Pink velvet cookies are a celebration in every bite, merging delightful flavors with vibrant visuals. With their tender texture and subtle chocolate notes, they are sure to be a hit whether for a gathering, a gift, or a personal treat.
The beauty of baking lies in experimenting with recipes, so feel free to modify flavors or add your personal touch. Most importantly, enjoy the process and share these delightful cookies with those you love.
Recipe Card
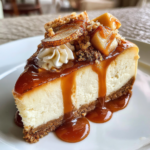
Delicious Caramel Apple Cheesecake Recipe
Ingredients
- 1 ½ cups graham cracker crumbs
- ⅓ cup sugar
- ½ cup unsalted butter melted
- 4 packages 8 ounces each cream cheese, softened
- 1 cup sugar
- 4 large eggs
- 1 teaspoon vanilla extract
- 2 cups chopped apples peeled and cored
- ½ teaspoon ground cinnamon
- 1 cup caramel sauce plus extra for drizzling
Instructions
- Preheat the oven to 350°F (175°C).
- In a medium bowl, combine graham cracker crumbs, sugar, and melted butter. Press mixture into the bottom of a springform pan to form a crust.
- In a large mixing bowl, beat the softened cream cheese until smooth. Gradually add sugar and mix until combined.
- Add eggs one at a time, mixing after each addition. Stir in vanilla extract, cinnamon, and chopped apples.
- Pour the apple-cheesecake mixture over the prepared crust in the springform pan.
- Bake for 55-60 minutes, or until the center is set but slightly wobbly.
- Remove the cheesecake from the oven and let it cool at room temperature for an hour before refrigerating for at least 4 hours, preferably overnight.
- Drizzle with caramel sauce before serving.
Notes
Additional serving suggestions: pair with a crisp salad, garlic bread, or roasted seasonal vegetables for balance.
For make-ahead, prep components separately and assemble just before heating to preserve texture.
Taste and adjust with acid (lemon/vinegar) and salt right at the end to wake up flavors.