Introduction
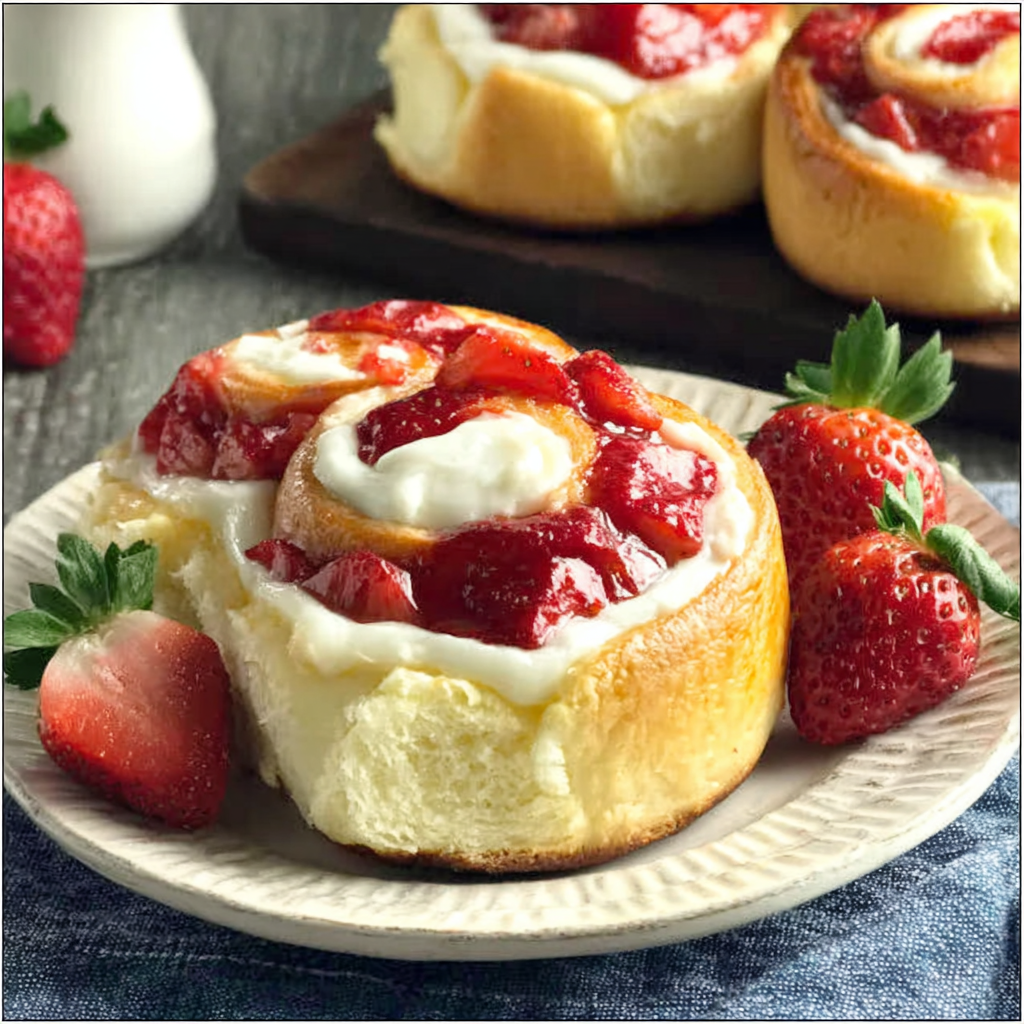
Sweet rolls are a beloved breakfast treat, but they can also transform into decadent desserts with the right filling. Strawberry Cheesecake Sweet Rolls take this idea to new heights, bringing together the flavors of fresh strawberries and rich cream cheese. These fluffy rolls are a delightful indulgence for brunch or dessert and are sure to impress family and friends.
The combination of gooey cream cheese filling, the sweetness of ripe strawberries, and a hint of vanilla creates a perfect harmony of flavors. Topped with a luscious glaze, these sweet rolls are not only a feast for the taste buds but also a beautiful addition to any dessert table. Embrace your inner baker and bring this delightful recipe into your kitchen.
Ingredients
- 4 cups all-purpose flour
This is the base for the sweet rolls, providing structure and texture. The gluten developed in the flour gives the rolls their soft, fluffy crumb. - 1/2 cup granulated sugar
Sugar sweetens the rolls and helps activate the yeast, contributing to a tender texture. It also enhances the overall flavor. - 1 packet (2 1/4 tsp) active dry yeast
Yeast is essential for leavening the dough, causing it to rise and become light and fluffy. It ferments sugar, producing carbon dioxide bubbles. - 1 cup warm milk (about 110°F)
Warm milk activates the yeast, providing the moisture necessary to grow. It also enriches the dough, adding flavor and aiding in browning. - 1/4 cup unsalted butter, melted
Butter adds richness and enhances the flavor of the rolls. It also contributes to a tender texture by coating the flour proteins. - 1 large egg
The egg binds the ingredients and adds moisture. It also helps with the structure of the sweet rolls as they bake. - 1 teaspoon vanilla extract
Vanilla adds warmth and enhances the sweetness of the rolls, rounding out the flavor profile. - 1 cup cream cheese, softened
Cream cheese forms the rich, creamy filling that gives these rolls their signature cheesecake flavor. Its tangy profile contrasts beautifully with the sweetness. - 1/2 cup powdered sugar
Powdered sugar sweetens the cream cheese filling and helps achieve a smooth consistency, making it easy to spread. - 1 cup fresh strawberries, chopped
Strawberries provide the fruity sweetness that complements the cream cheese, adding freshness and a burst of juicy flavor. - 1/2 teaspoon salt
Salt balances sweetness and enhances the dough's flavor, ensuring the final product isn't overly sweet. - For the glaze: 1 cup powdered sugar, 2 tablespoons milk, and 1 teaspoon vanilla extract
The glaze adds an extra layer of sweetness and makes the rolls visually appealing. It binds the ingredients and provides a shiny finish.
Directions & Preparation
Step 1: Activate the yeast by mixing warm milk and sugar, then add the yeast and let it sit for 5-10 minutes until frothy.
This step is crucial because it ensures that the yeast is alive and can properly leaven the dough. If the mixture does not froth, you may need to start over with fresh yeast. The sugar feeds the yeast, promoting its activation.
Step 2: In a large mixing bowl, combine flour and salt. Add the activated yeast mixture, melted butter, and egg, mixing until a dough forms.
This step brings together the dry and wet ingredients, forming a cohesive dough. Mixing well encourages gluten development in the flour, necessary for good texture. Ensure no dry flour remains for a smooth dough.
Step 3: Knead the dough for about 5-7 minutes until smooth and elastic, then place it in a greased bowl and cover with plastic wrap.
Kneading develops gluten, which provides elasticity and strength to the dough. A smooth texture indicates adequate kneading. Letting it rise in a covered bowl creates a warm environment for the yeast to activate and rise.
Step 4: Let the dough rise in a warm place for about 1 hour, or until doubled in size.
The rising period allows the dough to expand and develop flavor. A warm environment provides the yeast with the ideal conditions to ferment sugar and produce carbon dioxide. Covering helps retain moisture.
Step 5: While the dough rises, prepare the filling by mixing cream cheese, powdered sugar, chopped strawberries, and a teaspoon of vanilla until smooth.
Mixing the filling early allows the flavors to meld together. A smooth consistency ensures that the filling spreads easily over the rolled dough later. Adjust sweetness if necessary.
Step 6: Once the dough has risen, punch it down gently to release the air, then roll it out on a floured surface into a rectangle.
Punching down allows you to deflate the dough gently and redistribute the yeast, ensuring an even texture. Rolling it out creates the perfect canvas for your filling, maximizing the area.
Step 7: Spread the cream cheese mixture evenly onto the rolled dough, leaving a small border around the edges.
Spreading the filling evenly allows each roll to have a balanced flavor and prevents overflow during baking. The border helps seal the edges when rolling up the dough.
Step 8: Begin rolling the dough tightly from one long end to the other, then slice into 12 equal pieces.
Rolling tightly ensures that the sweet rolls hold their shape and don’t unravel during baking. Equal slices help ensure consistent baking times and nicer presentation.
Step 9: Place the rolls in a greased baking dish and cover them again to rise for about 30 minutes.
This second rise improves the texture and fluffiness of the rolls. Allowing them to rise again after shaping lets the gluten relax and increases their volume for a light and airy result.
Step 10: Preheat the oven to 350°F (175°C), then bake the rolls for 25-30 minutes until golden brown.
Preheating the oven gives the rolls a good start in baking, allowing for proper crust development. Keep an eye on the rolls to prevent over-baking; they should have a golden appearance.
Step 11: While they bake, mix the glaze ingredients until smooth and set aside.
Preparing the glaze while the rolls are baking ensures you're ready to finish them as soon as they come out of the oven. A smooth consistency allows it to drizzle easily over the rolls.
Step 12: Once baked, remove the rolls from the oven and let them cool slightly before drizzling with glaze.
Cooling slightly helps the rolls set and absorb some glaze, enhancing the flavor. Drizzling while warm allows the glaze to seep into the rolls, creating a delicious combination.
Step 13: Serve warm and enjoy the delightful combination of strawberries and cheesecake flavors!
Serving warm enhances the experience, as flavors and textures are at their best. The creamy filling and fluffy dough create a comforting treat perfect for any occasion.

Choosing the Right Strawberries
Using fresh, ripe strawberries can significantly enhance the flavor of your sweet rolls. Look for strawberries that are bright red, firm, and fragrant. Overripe or mushy strawberries can lead to a filling that is too watery, impacting the overall texture of the rolls. Washing and hulling them just before use ensures that they retain their flavor and juiciness.
Tips for Perfect Dough
Achieving the perfect dough for your sweet rolls relies on proper kneading and rising methods. Make sure to measure your flour accurately; too much can lead to a dry dough. Knead until the dough is elastic and smooth, which usually takes about 5-7 minutes. The first rise should be in a warm environment to keep the yeast active, while the second rise after shaping helps the rolls become light and fluffy.
Experimenting with Flavors
Feel free to customize the filling for your sweet rolls! You can experiment with different berries, such as blueberries or raspberries, or even add chocolate chips for a richer flavor. For a twist on the classic cheesecake flavor, consider adding a hint of lemon zest for brightness or using flavored cream cheese. These variations can make the recipe your own and keep it exciting!
FAQs
What can I do if my dough doesn't rise?
If your dough hasn't risen, check the yeast's expiration date, as it may not be active. Ensure the liquid used to activate the yeast is warm, not hot, as temperatures above 120°F can kill the yeast.
My filling turned out too watery. What can I do?
If your filling is too watery, it may be due to using overly ripe strawberries. Next time, use firmer strawberries and consider draining excess liquid before mixing and spreading.
Can I substitute the cream cheese with something else?
Yes, you can use mascarpone or a dairy-free cream cheese alternative if you prefer. Just ensure the consistency is similar for easy spreading.
How can I prevent my rolls from burning on the bottom?
To prevent burnt bottoms, consider placing a baking sheet under your rolls while they bake. This will help distribute the heat more evenly.
Is there a way to enhance the glaze flavor?
Absolutely! You can add a teaspoon of almond extract or a splash of fresh lemon juice to the glaze for added flavor complexity.
What should I do if my rolls are dense instead of fluffy?
Over-kneading can lead to dense rolls, as can using too much flour. Ensure you measure your ingredients accurately and knead just until smooth and elastic.
Conclusion
Strawberry Cheesecake Sweet Rolls are a delightful treat that combines the flavors of a classic dessert with the comforting texture of sweet rolls. Ideal for sharing at gatherings or enjoying as a weekend breakfast, these rolls are sure to become a favorite in your baking repertoire.
With simple ingredients and a bit of patience, you can create a dish that is not only satisfying to your sweet tooth but also a joy to bake. Embrace your cooking adventure, and enjoy every bite of these beautiful strawberry cheesecake rolls!
Recipe Card
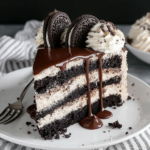
Decadent Chocolate Dessert for Oreo Lovers
Ingredients
- 1 ¾ cups all-purpose flour
- 1 ¾ cups granulated sugar
- ¾ cup unsweetened cocoa powder
- 1 ½ teaspoons baking powder
- 1 ½ teaspoons baking soda
- 1 teaspoon salt
- 2 large eggs
- 1 cup whole milk
- ½ cup vegetable oil
- 2 teaspoons vanilla extract
- 1 package 14 oz Oreo cookies
- 1 cup heavy cream
- 2 cups powdered sugar
- ½ teaspoon peppermint extract optional
Instructions
- Preheat your oven to 350°F (175°C).
- Grease and flour two 9-inch round cake pans.
- In a large mixing bowl, combine the dry ingredients: flour, sugar, cocoa powder, baking powder, baking soda, and salt.
- In a separate bowl, whisk together the eggs, milk, oil, and vanilla.
- Gradually add the wet ingredients to the dry ingredients, mixing until just combined.
- Gently fold in crushed Oreo cookies into the batter.
- Divide the batter evenly between the prepared cake pans and smooth the tops.
- Bake for 30-35 minutes, or until a toothpick inserted in the center comes out clean.
- Allow the cakes to cool in the pans for 10 minutes, then transfer to wire racks to cool completely.
- While the cake layers cool, make the frosting by beating the heavy cream until soft peaks form.
- Gradually add the powdered sugar while continuing to beat the whipped cream.
- Once fully whipped and fluffy, fold in crushed Oreo cookies to the frosting.
- Assemble the cake by placing one layer on a serving plate, spreading a generous amount of frosting on top, then adding the second layer.
- Frost the top and sides of the cake with the remaining frosting, decorating as desired.
Notes
Additional serving suggestions: pair with a crisp salad, garlic bread, or roasted seasonal vegetables for balance.
For make-ahead, prep components separately and assemble just before heating to preserve texture.
Taste and adjust with acid (lemon/vinegar) and salt right at the end to wake up flavors.