Introduction
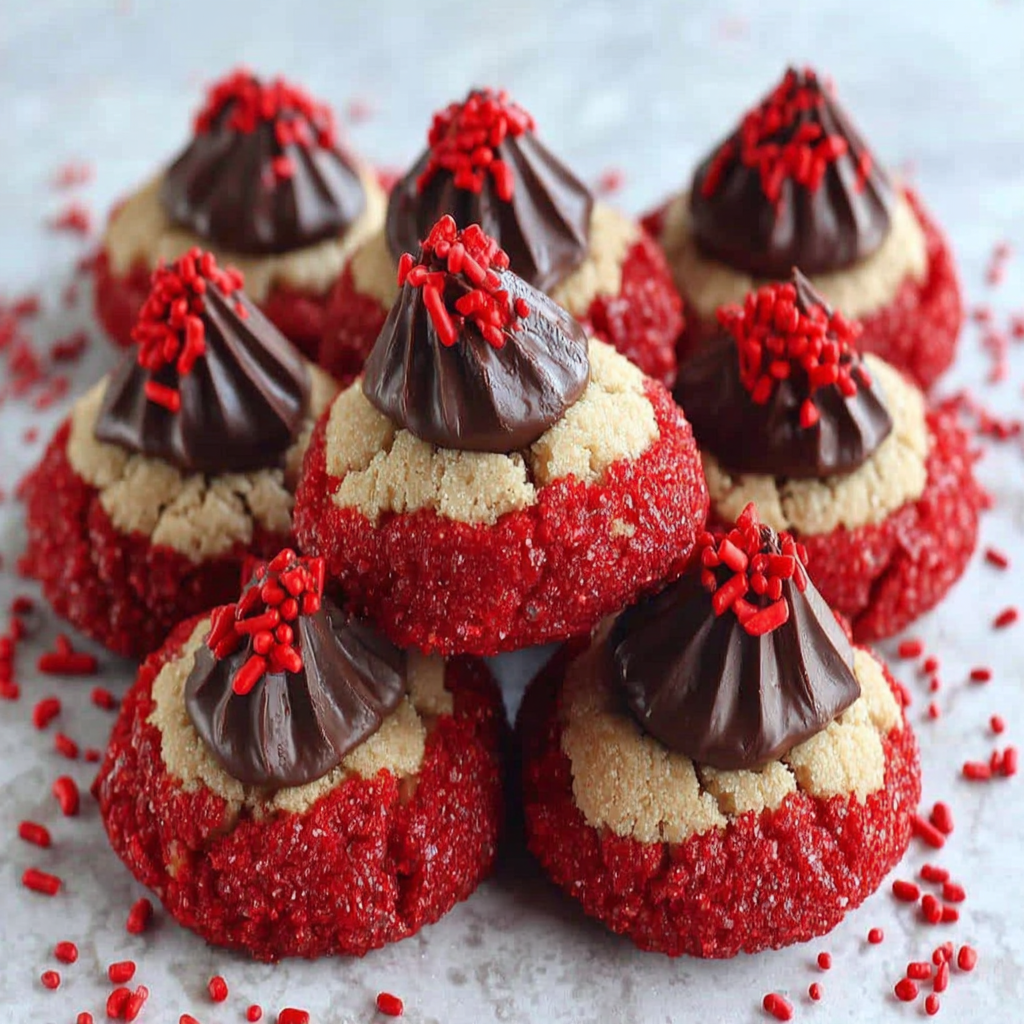
Christmas is a time for cozy gatherings, festive decorations, and, of course, baking delicious treats. One of the most beloved cookies that find their way onto holiday cookie trays is the classic Peanut Butter Blossom. These delightful cookies combine the rich, nutty flavor of peanut butter with the sweetness of chocolate in the form of candy kisses tucked right in the center.
Biting into a warm, freshly baked Peanut Butter Blossom is a nostalgic experience that evokes memories of family kitchens filled with laughter and the smell of cookies wafting through the air. As you prepare to make these mouthwatering cookies, you'll find that they are not only easy to make but also an absolute joy to share with friends and family during the holiday season.
Ingredients
- 1 cup creamy peanut butter
Peanut butter serves as the base of the cookie dough, providing a rich and nutty flavor along with moisture. Its unique texture contributes to the chewiness that makes these cookies so irresistible. - 1 cup granulated sugar
Granulated sugar adds sweetness to the cookie, balancing the savory notes of the peanut butter. It also helps achieve the perfect texture, giving the cookies a slightly crisp exterior while maintaining a soft center. - 1 cup brown sugar
Brown sugar introduces a hint of molasses flavor, enhancing the overall taste and contributing to the chewiness. It also helps the cookies retain moisture during baking, making them more enjoyable to eat. - 2 large eggs
Eggs act as a binding agent, helping the ingredients come together to form a cohesive dough. They also add richness and contribute to the overall texture of the cookies. - 1 teaspoon baking soda
Baking soda serves as a leavening agent, helping the cookies rise and become airy while baking. It also balances the acidity of the brown sugar, contributing to the overall flavor. - 1/2 teaspoon vanilla extract
Vanilla extract enhances the flavor profile of the cookies, adding a warm, sweet note that complements the peanut butter. It's a staple in baked goods that enhances the overall aroma and taste. - 1/4 teaspoon salt
Salt is an essential ingredient that enhances the flavors of the cookie, balancing the sweetness from the sugars and bringing out the nuttiness of the peanut butter. - 35 chocolate kisses, unwrapped
Chocolate kisses are the star topping of these cookies, adding a burst of rich chocolate flavor that contrasts beautifully with the peanut butter dough. They melt slightly when the cookies are hot, creating a delicious overall experience. - 1/4 cup granulated sugar for rolling
Using granulated sugar for rolling the cookie dough provides added sweetness and creates a lovely crackly surface that enhances the cookie's appearance.
Directions & Preparation
Step 1: Preheat your oven to 350°F (175°C).
Preheating the oven is essential for even baking. It allows the cookies to rise properly and develop a golden-brown color. Make sure your oven reaches the correct temperature before placing the cookies inside to achieve the best results.
Step 2: In a large mixing bowl, combine the creamy peanut butter, granulated sugar, brown sugar, eggs, baking soda, vanilla extract, and salt.
Mixing these ingredients together creates a cohesive dough. The peanut butter, sugars, and eggs contribute to the cookie's texture and flavor. Ensure to blend well until the mixture is smooth, as this will aid in the even distribution of flavors.
Step 3: Once the mixture is smooth, cover it and refrigerate for about 30 minutes.
Chilling the dough is a crucial step as it solidifies the fats in the peanut butter, making the dough easier to handle and preventing the cookies from spreading too much during baking. This helps maintain a soft and chewy center.
Step 4: While the dough chills, unwrap the chocolate kisses and set them aside.
Unwrapping the kisses ahead of time streamlines the process once the cookies come out of the oven. You will want to place the kisses in the cookies quickly before they cool too much to ensure they melt slightly and adhere well.
Step 5: Prepare a baking sheet by lining it with parchment paper.
Using parchment paper prevents the cookies from sticking to the baking sheet and makes for easier cleanup. It also promotes even baking, ensuring that the bottoms of the cookies don’t become overly browned.
Step 6: Once chilled, roll the dough into 1-inch balls and then roll each ball in granulated sugar.
Rolling the dough balls in sugar not only adds sweetness but also creates a visually appealing crackly surface when baked. Make sure the balls are uniform in size for even baking.
Step 7: Place the sugar-coated dough balls on the prepared baking sheet, spacing them about 2 inches apart.
Spacing the dough balls allows them room to spread without merging together. Proper spacing is key to ensuring that each cookie bakes evenly and retains a chewy center.
Step 8: Bake in the preheated oven for about 10-12 minutes, or until the edges are lightly golden.
Baking time can vary depending on your oven and the size of your dough balls. Keep an eye on the cookies; they should be set at the edges while the center remains soft. This indicates they will finish cooking outside the oven.
Step 9: As soon as you remove the cookies from the oven, press a chocolate kiss into the center of each cookie immediately.
Pressing the chocolate kiss into the warm cookie allows it to melt slightly and settle into the dough. This step is crucial for achieving that classic Peanut Butter Blossom look and flavor.
Step 10: Allow the cookies to cool on the baking sheet for 5 minutes before transferring them to a wire rack.
Cooling the cookies on the baking sheet first helps them set and prevents breakage. Transferring them to a wire rack allows for proper air circulation, ensuring they cool evenly and maintain their desired texture.

The History Behind Peanut Butter Blossoms
Peanut Butter Blossom Cookies have become a holiday staple in many households, but their origins date back to the 1930s. Initially appearing in various forms and under different names, they gained widespread popularity after being featured in baking contests. Their combination of chocolate and peanut butter quickly captivated taste buds, solidifying it as a timeless favorite.
Tips for Achieving the Perfect Texture
To obtain the desired soft and chewy texture in your Peanut Butter Blossom Cookies, ensure not to over-mix the dough. Over-mixing can lead to tough cookies. Additionally, allow your dough to chill adequately, as this step prevents excessive spreading during baking, yielding cookies that are perfectly puffed and tender.
Customizing Your Cookie Experience
While the classic recipe is delightful as is, there are various ways to customize Peanut Butter Blossom Cookies. Consider adding a sprinkle of sea salt over the chocolate kisses for a sweet-salty contrast or incorporating chopped nuts into the dough for added texture. Each variation enriches the traditional experience and caters to personal preferences.
FAQs
What should I do if my cookie dough is too thick?
If your cookie dough feels overly thick, you can add a tablespoon of milk to loosen it slightly. Be sure not to overdo it, as you want to maintain the cookies' structure.
Why do my cookies taste bland?
Bland cookies may result from insufficient salt or sugar. Always measure your ingredients accurately. If they taste flat, consider adding an extra pinch of salt or slightly increasing the sugar.
What happens if I overbake my Peanut Butter Blossoms?
Overbaking can lead to dry, crumbly cookies. Keep an eye on them and try to take them out of the oven as soon as the edges start to brown slightly, allowing residual heat to finish cooking the centers.
Can I substitute crunchy peanut butter for creamy?
Absolutely! Crunchy peanut butter can add wonderful texture to these cookies, but keep in mind that it might change the look and chewiness. Adjust mixing time accordingly to incorporate the nuts.
How can I tell when my cookies are done baking?
Look for a slight browning on the edges and that the centers appear set but still soft. They will continue baking slightly as they cool on the baking sheet.
What can I use instead of chocolate kisses?
If you don’t have chocolate kisses, you can substitute with chocolate chips or chunks. Just keep in mind that they may not give you the same iconic appearance.
Conclusion
After enjoying the delightful experience of baking and sharing Mouthwatering Christmas Peanut Butter Blossom Cookies, you'll surely be creating precious memories in your kitchen. These cookies symbolize the warmth of the holiday season, serving as perfect gifts or treats for gatherings.
This simple yet flavorful recipe is ideal for both seasoned bakers and those just beginning their culinary journey. So gather your loved ones, roll up your sleeves, and enjoy the sweetness of this heartwarming tradition.
Recipe Card
Mouthwatering Christmas Peanut Butter Blossom Cookies
Ingredients
- 1 cup creamy peanut butter
- 1 cup granulated sugar
- 1 cup brown sugar
- 2 large eggs
- 1 teaspoon baking soda
- 1/2 teaspoon vanilla extract
- 1/4 teaspoon salt
- 35 chocolate kisses unwrapped
- 1/4 cup granulated sugar for rolling
Instructions
- Preheat your oven to 350°F (175°C).
- In a large mixing bowl, combine the creamy peanut butter, granulated sugar, brown sugar, eggs, baking soda, vanilla extract, and salt.
- Once the mixture is smooth, cover it and refrigerate for about 30 minutes.
- While the dough chills, unwrap the chocolate kisses and set them aside.
- Prepare a baking sheet by lining it with parchment paper.
- Once chilled, roll the dough into 1-inch balls and then roll each ball in granulated sugar.
- Place the sugar-coated dough balls on the prepared baking sheet, spacing them about 2 inches apart.
- Bake in the preheated oven for about 10-12 minutes, or until the edges are lightly golden.
- As soon as you remove the cookies from the oven, press a chocolate kiss into the center of each cookie immediately.
- Allow the cookies to cool on the baking sheet for 5 minutes before transferring them to a wire rack.
Notes
Additional serving suggestions: pair with a crisp salad, garlic bread, or roasted seasonal vegetables for balance.
For make-ahead, prep components separately and assemble just before heating to preserve texture.
Taste and adjust with acid (lemon/vinegar) and salt right at the end to wake up flavors.