Introduction
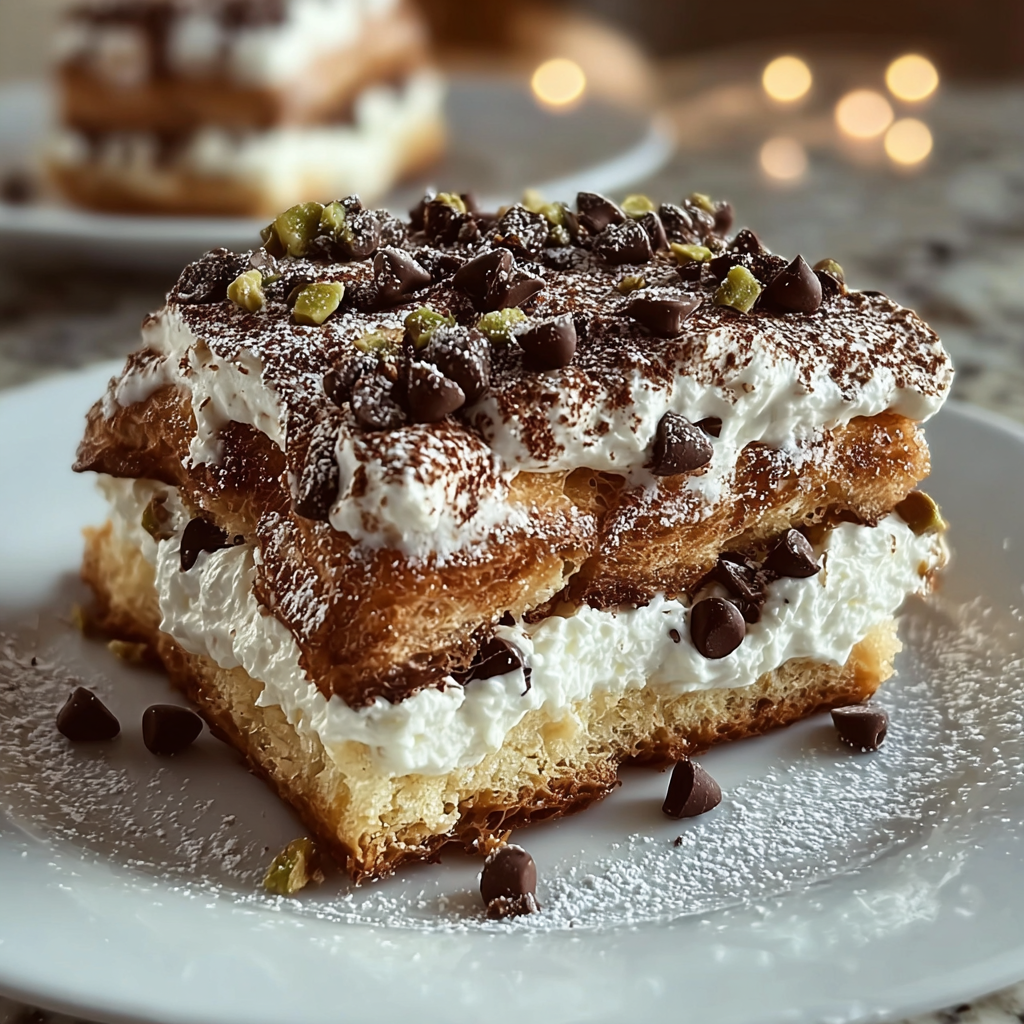
When you think of Italian desserts, cannoli often come to mind. These delightful pastries are filled with rich ricotta cheese, and each bite is a harmonious blend of creaminess and sweetness. However, crafting traditional cannoli can be a tedious process, involving hand-rolling shells and frying them to a perfect crispness. Luckily, there's a way to enjoy all the flavors of this beloved treat without the fuss: Classic Cannoli Squares.
These squares allow you to embrace the essence of cannoli with a simple, baked interpretation that's bound to impress. The creamy filling rests between layers of a sweet, cookie-like base, making them easier to cut and serve, perfect for gatherings or an afternoon treat. Alongside the satisfaction of homemade desserts, you'll find that these squares are a delightful twist on the classic.
Ingredients
- 1 cup all-purpose flour
This forms the base structure of the squares, providing the necessary backbone for the dessert. The flour helps bind the ingredients together, ensuring a tender crumb. - 1/2 cup granulated sugar
Sugar adds sweetness to the dessert balance, enhancing the flavor profile of both the crust and the filling. It also contributes to the browning and texture. - 1/4 cup unsweetened cocoa powder
Cocoa powder infuses rich chocolate flavor into the squares while providing a darker color. It enhances the dessert’s taste and complements the creamy filling. - 1/2 teaspoon baking powder
This leavening agent helps the squares rise slightly during baking, making them light while preventing them from being overly dense. - 1/4 teaspoon salt
Salt balances the sweetness and intensifies the flavors within the dessert. It’s a crucial component that brings all the other ingredients together. - 1/2 cup unsalted butter, softened
Butter not only enriches flavor but also aids in creating a moist and tender texture in the squares. It adds necessary fat for richness. - 1 large egg
The egg acts as a binder for the dough, giving it stability and moisture. It also contributes to the overall richness of the dessert. - 1 cup ricotta cheese
The star of the filling, ricotta cheese provides a creamy texture and subtly sweet flavor. It captures the essence of traditional cannoli filling. - 1/2 cup powdered sugar
Powdered sugar lends sweetness and a smooth texture to the filling, ensuring it melds beautifully with the ricotta without graininess. - 1 teaspoon vanilla extract
Vanilla adds depth of flavor, enhancing the sweetness of the ricotta. It offers a warm note that complements the dessert as a whole. - 2 tablespoons mini chocolate chips
These provide pockets of chocolate flavor within the filling, creating delightful bursts of sweetness in every bite. They are a nod to traditional cannoli. - 1/4 teaspoon ground cinnamon
Cinnamon introduces an additional layer of warm spice, enriching the flavor profile of the filling and tying the ingredients harmoniously together.
Directions & Preparation
Step 1: Preheat your oven to 350°F (175°C) and prepare a baking dish.
Preheating the oven is crucial to ensure even baking from the moment you place the squares inside. Using a greased or lined baking dish prevents the squares from sticking, which is essential for easy serving later.
Step 2: In a large bowl, combine the flour, sugar, cocoa powder, baking powder, and salt.
Mixing the dry ingredients together first helps to evenly distribute them, ensuring a uniform flavor and texture throughout your dessert. This preparation step also aerates the flour, essential for a light and tender final product.
Step 3: Add the softened butter and egg to the dry ingredients, mixing until combined.
Incorporating butter and egg into the dry mix creates a cohesive dough. The key is to thoroughly blend until the mixture resembles coarse crumbs, which will ensure the squares hold their shape during baking.
Step 4: Spread the dough evenly into the prepared baking dish.
Evenly spreading the dough is crucial for uniform baking. Press it down gently but firmly, ensuring that it fills the corners of the dish to avoid any undercooked areas.
Step 5: Bake for 15-20 minutes until the edges are set but the center remains slightly soft.
Keeping the center slightly underbaked ensures a moist and fudgy texture, mirroring the traditional cannoli shell. Remember, the squares will firm up as they cool.
Step 6: While the base cools, prepare the cannoli filling by mixing the ricotta cheese, powdered sugar, vanilla, cinnamon, and chocolate chips.
Whipping together the filling ingredients creates a rich and creamy texture while ensuring an even distribution of flavor. This step is essential to achieve the traditional cannoli taste.
Step 7: Once the base cools, spread the filling over the top in an even layer.
Spreading the filling over a cooled base is vital to prevent it from melting or mixing into the squares. An even layer guarantees that every bite is perfectly balanced with the filling.
Step 8: Chill the assembled squares in the refrigerator for at least an hour to set.
Chilling allows the filling to firm up, making it easier to cut the squares without ruining the layers. It also melds the flavors together, enhancing the overall taste.
Step 9: Cut into squares and serve as dessert.
Cutting after chilling not only ensures cleaner cuts but also presents the dessert beautifully for serving. Each square should reveal the lovely layers within, inviting your guests to indulge.

The Importance of Quality Ingredients in Cannoli Squares
Using quality ingredients is essential in creating delectable Cannoli Squares. The taste of fresh ricotta can significantly elevate the flavor, so always opt for high-quality cheese. Similarly, pure vanilla extract, as opposed to imitation, enhances the overall flavor profile. The attention to ingredient quality ensures that each square is as delightful and harmonious as possible, making a noticeable difference.
Chilling: A Crucial Step for the Perfect Texture
Chilling the assembled squares is more than just a serving suggestion; it's a crucial step for the texture and flavor melding. Allowing time in the refrigerator gives the filling a chance to firm up, making cutting and serving easier. This time also enriches the flavors as they mingle, resulting in a more cohesive taste profile that mirrors the best of traditional cannoli.
Experimenting with Flavors and Ingredients
Classic Cannoli Squares can be an excellent canvas for flavor experimentation. You can add citrus zest, such as orange or lemon, to the filling for a bright twist. Alternatively, swapping dark chocolate chips for white chocolate can create a sweeter, creamier variation. These adaptations not only keep the recipe exciting but also allow you to personalize your dessert to suit different tastes.
FAQs
What can I do if the squares seem too crumbly?
If your squares are too crumbly, ensure you've properly mixed in the butter, as insufficient moisture can lead to a dry texture. You might also consider adding a touch of milk to the dough to help bind it better.
How can I adjust the sweetness of the filling?
To adjust the sweetness in your ricotta filling, gradually add more powdered sugar until you reach the desired level. Alternatively, a touch of salt can help balance out excess sweetness if your mixture becomes too sweet.
Can I use a different type of cheese for the filling?
Yes, while ricotta is traditional, mascarpone can be a luxurious alternative, offering a creamier texture. Just ensure the flavor balance remains harmonious.
What if I want to make these squares in advance?
You can prepare the dough and filling ahead of time, storing each in the refrigerator separately until you're ready to bake and assemble them, ensuring freshness upon serving.
How do I prevent the filling from being too runny?
Make sure to drain the ricotta well before use to remove excess moisture. If needed, a little bit of cornstarch can help thicken the filling.
Can I scale this recipe for a larger batch?
Absolutely! Simply double the ingredients while maintaining the same ratios. Ensure you have a larger baking dish to accommodate the increased volume.
Conclusion
Classic Cannoli Squares effortlessly blend the deliciousness of traditional cannoli with the convenience of a dessert that’s easy to prepare and serve. With layers of creamy filling and sweet, cocoa-infused crust, they're perfect for any occasion or just an indulgent treat at home.
By embracing this simple yet delightful dessert, you can share the joy of authentic Italian flavors without the stress of crafting individual pastries. Enjoy the process and the compliments that are sure to follow with each lovingly created square.
Recipe Card

Indulging in Classic Cannoli Squares at Home
Ingredients
- 1 cup all-purpose flour
- 1/2 cup granulated sugar
- 1/4 cup unsweetened cocoa powder
- 1/2 teaspoon baking powder
- 1/4 teaspoon salt
- 1/2 cup unsalted butter softened
- 1 large egg
- 1 cup ricotta cheese
- 1/2 cup powdered sugar
- 1 teaspoon vanilla extract
- 2 tablespoons mini chocolate chips
- 1/4 teaspoon ground cinnamon
Instructions
- Preheat your oven to 350°F (175°C) and prepare a baking dish.
- In a large bowl, combine the flour, sugar, cocoa powder, baking powder, and salt.
- Add the softened butter and egg to the dry ingredients, mixing until combined.
- Spread the dough evenly into the prepared baking dish.
- Bake for 15-20 minutes until the edges are set but the center remains slightly soft.
- While the base cools, prepare the cannoli filling by mixing the ricotta cheese, powdered sugar, vanilla, cinnamon, and chocolate chips.
- Once the base cools, spread the filling over the top in an even layer.
- Chill the assembled squares in the refrigerator for at least an hour to set.
- Cut into squares and serve as dessert.
Notes
Additional serving suggestions: pair with a crisp salad, garlic bread, or roasted seasonal vegetables for balance.
For make-ahead, prep components separately and assemble just before heating to preserve texture.
Taste and adjust with acid (lemon/vinegar) and salt right at the end to wake up flavors.