Introduction
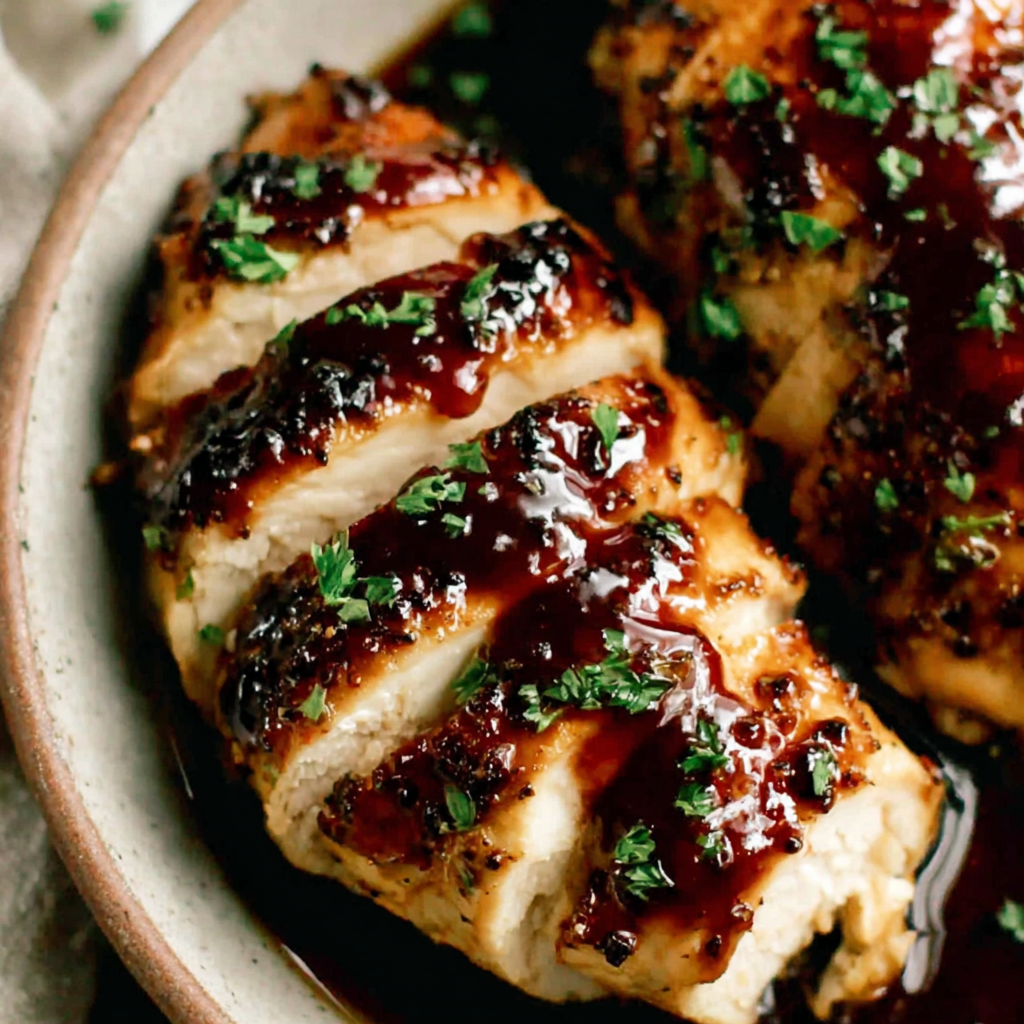
Honey garlic chicken breast is a dish that combines the earthy sweetness of honey with the robust flavor of garlic, creating a delightful balance that elevates chicken to new heights. It's simple to prepare and caters to family members of all ages, making it a perfect choice for any weeknight dinner or special occasion.
This dish is more than just delicious; it is also quick to make, ensuring that you can enjoy a hearty meal without spending hours in the kitchen. With minimal ingredients, you can whip up a flavorful entrée that is sure to impress.
As you cook, the honey caramelizes slightly, creating a beautiful glaze that clings to the chicken, while the garlic infuses the meat with its irresistible aroma. Let's explore the ingredients and get into the cooking process!
Ingredients
- 4 chicken breasts (about 1.5 lbs)
Choose boneless, skinless chicken breasts for ease and quicker cooking. They're lean, high in protein, and provide a perfect canvas for the honey-garlic glaze. - 1/2 cup honey
Honey not only sweetens the dish but also adds moisture, enriching the flavor profile. When cooked, it caramelizes, giving the chicken a delightful shine. - 1/4 cup soy sauce
Soy sauce adds depth and umami to the dish, enhancing the savory notes. It also aids in marinating the chicken, making it tender and flavorful. - 4 cloves garlic, minced
Garlic adds a robust aroma and flavor, balancing the sweetness of honey. It infuses the chicken and sauce with its rich, savory essence. - 1 tablespoon olive oil
Used for cooking, olive oil prevents sticking and adds healthy fats, creating a crispy exterior on the chicken for great texture. - Salt and pepper to taste
Seasoning is essential for highlighting flavors; a touch of salt complements the honey and garlic and balances the dish. - 1 tablespoon chopped green onions (for garnish)
These add freshness and a pop of color, brightening the dish visually and adding a mild, oniony crunch.
Directions & Preparation
Step 1: Prepare the marinade by whisking honey, soy sauce, and minced garlic in a bowl.
Creating the marinade is crucial as it infuses the chicken with flavor while tenderizing it. Combining these ingredients before adding the chicken ensures even distribution of flavors throughout the meat.
Step 2: Place chicken breasts in the marinade and marinate for at least 30 minutes, or up to 2 hours.
Marinating allows the chicken to absorb the flavors from the honey and garlic, making the final dish more succulent and flavorful. If short on time, even a quick 30-minute soak will enhance the taste.
Step 3: Preheat your oven to 375°F (190°C).
Preheating the oven is key for even cooking. Your chicken should start cooking in a hot environment, which helps achieve a golden-brown glaze by the end of the cooking process.
Step 4: Heat olive oil in an oven-safe skillet over medium-high heat.
Using an oven-safe skillet allows you to brown the chicken on the stovetop and then transfer it directly to the oven. This step adds a beautiful caramelization to the chicken's exterior before finishing it in the oven.
Step 5: Remove chicken from the marinade, letting excess drip off, and place in the skillet.
This step is important for ensuring that the chicken browns effectively. Too much marinade can create steam instead of sear, which prevents that desired golden crust.
Step 6: Sear the chicken for about 4-5 minutes per side until golden brown.
Searing adds a crispy texture, locking in juices while developing a complex flavor profile. Pay attention to the color development; if it sticks to the pan, it needs more time.
Step 7: After searing, pour the remaining marinade over the chicken in the skillet.
This step ensures that the chicken cooks in the flavorful sauce, further enhancing the taste as it bakes. You'll end up with a rich glaze once the chicken is finished.
Step 8: Transfer the skillet to the preheated oven and bake for 20-25 minutes or until the chicken is cooked through.
Baking ensures the chicken cooks evenly. Use a meat thermometer to check doneness; the internal temperature should reach 165°F (75°C). This method keeps the chicken juicy and allows flavors to meld.
Step 9: Let the chicken rest for 5 minutes before slicing.
Resting is essential as it allows juices to redistribute throughout the meat, making each bite wonderfully moist. Slicing too soon can cause these juices to run out, leaving you with dry chicken.
Step 10: Garnish with chopped green onions and serve.
Adding fresh green onions at the end not only enhances the dish's appearance but also adds a crunch and fresh flavor that balances the sweetness of the honey and garlic.

Unlocking Flavors: The Marination Process
Marinating chicken in a honey-soy mixture is an art that transforms simple ingredients into a culinary experience. This process not only imparts flavor but also tenderizes the meat, making every bite succulent and juicy. The longer the chicken marinates, the deeper these flavors penetrate, ensuring that each piece is infused with a sweet, savory essence.
Searing: The Secret to Crispy, Golden Chicken
Searing chicken breasts before baking is a crucial step that should not be overlooked. This technique creates a caramelized crust, locking in juices while forming a delightful texture. By browning the chicken over medium-high heat, you also enhance the dish's flavor complexity, ensuring that each slice delivers a satisfying crunch along with the tender meat.
Serving Suggestions: Pairing Perfection
Honey garlic chicken breast is versatile and pairs well with a variety of sides. Consider serving it over a bed of fluffy jasmine rice of steamed vegetables for a balanced meal. The sweet sauce drizzled over the rice adds a delicious contrast, making every bite irresistible. For a lighter option, a fresh green salad can complement the richness of the chicken beautifully.
FAQs
What if the sauce is too thick after cooking?
If the sauce is too thick, simply add a tablespoon of water or chicken broth to loosen it. Stir over low heat until the desired consistency is reached.
Can I adjust the sweetness of the honey garlic sauce?
Absolutely! If you prefer a less sweet flavor, reduce the amount of honey to 1/3 cup and add a splash more soy sauce for balance.
What can I do if the chicken is undercooked after baking?
If the chicken isn’t fully cooked after the recommended time, return it to the oven and continue baking in 5-minute intervals, checking for doneness with a meat thermometer.
Can I use skin-on chicken for this recipe?
Yes, using skin-on chicken can enhance flavor but ensure you adjust the cooking time slightly. The skin will also crisp up nicely during the searing process.
What is the best way to serve honey garlic chicken for a gathering?
For gatherings, consider slicing the chicken breasts and arranging them on a platter, drizzling the extra sauce on top. Garnishing with green onions adds a fresh touch that appeals to guests.
How can I make this recipe milder for kids?
To make it milder, reduce the amount of garlic and consider using less soy sauce. You can also add a bit more honey to balance flavors without making it too savory.
Conclusion
Honey garlic chicken breast is not just a dish; it’s a delightful experience that can transform any meal into something special. With its sweet and savory flavors, it's bound to satisfy even the pickiest eaters at your table.
By embracing the simplicity of the recipe and using fresh ingredients, you'll create a dish that's both comforting and gourmet. Enjoy the cooking process, and savor the mouthwatering results of your efforts!
Recipe Card
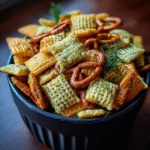
Tangy Dill Pickle Chex Mix Recipe for Snack Lovers
Ingredients
- 4 cups Chex cereal
- 1 cup pretzel sticks
- 1 cup roasted unsalted nuts almonds or cashews
- 1/2 cup dill pickle juice
- 1 tablespoon olive oil
- 2 teaspoons garlic powder
- 2 teaspoons onion powder
- 1-2 tablespoons dill weed to taste
- 1/2 teaspoon salt or to taste
Instructions
- Preheat your oven to 300°F (150°C).
- In a large mixing bowl, combine Chex cereal, pretzel sticks, and nuts.
- In a separate bowl, whisk together dill pickle juice, olive oil, garlic powder, onion powder, dill weed, and salt.
- Pour the dill pickle mixture over the cereal mix and toss to coat evenly.
- Spread the coated mix in an even layer on a baking sheet.
- Bake for 30-35 minutes, stirring every 10 minutes.
- Remove from the oven and let cool completely.
- Once cooled, store in an airtight container.
Notes
Additional serving suggestions: pair with a crisp salad, garlic bread, or roasted seasonal vegetables for balance.
For make-ahead, prep components separately and assemble just before heating to preserve texture.
Taste and adjust with acid (lemon/vinegar) and salt right at the end to wake up flavors.


